How to Create a Static Blog with TypeScript, React, NextJS, and TailwindCSS
2022 Update
I have switched to using Zola. It is fast, simple, and flexible enough for my needs. It's less work than maintaining my own code.
Why a Static Blog?
In 2020, implementing a website as static and serverless, with HTML, CSS, JavaScript hosted by some cloud provider, usually with a CDN, seems to have become a popular choice. And with good reason. It’s cheap, fast, reliable, highly available -- and most critically, it's simple.
Managing complexity is the most important technical topic in software development. In my view, it's so important that Software's Primary Technical Imperative has to be managing complexity.
--Steve McConnell, Code Complete 2
There is no web server to provision and keep running. No database to manage. Fewer moving parts and integrations. Fewer lines of code, and fewer dependencies to keep up to date. Less complexity means more opportunity to focus on your core domain[1], which in the case of a blog, is your content (and to some extent, the distinctive style and layout).
I built this blog as a static site, and had a great time building it. I took notes as I worked, and writing this tutorial was an opportunity to review those notes, recall what I learned, practice with the code and libraries, and deepen my understanding of the technologies I used. There are already plenty of articles on creating static blogs, but maybe this one will help a few folks out -- especially those who want to use the specific blend of tools I chose.
An Overview of the Design
NextJS is the main framework for generating the static assets. The frontend code is written with TypeScript, ReactJS, and Tailwind. I use Unified/Remark/Rehype to render the Markdown, and PrismJS for syntax highlighting code blocks.
I host the web assets from an AWS S3 bucket, and use CloudFlare as the CDN. S3 is cheap and offers high availability. CloudFlare's free account provides unlimited access, a free SSL cert, free DDoS protection, and they provide an easy way to "purge" the cache so that changes to the blog can be made visible. Bottom line: they have a free tier, and AWS CloudFront doesn't. And CloudFlare is a key component for keeping costs very low: many GET requests to resources in S3, added to the cost of data transfer to the external internet, can add up quickly. Using a CDN can greatly reduce those costs; a free CDN means this blog costs almost nothing to host.
Set up the Package
This walkthrough assumes you already have NodeJS installed, and that you are familiar with the basics of ReactJS and TypeScript (by basics, you have completed introductory tutorials).
If you are impatient, and want to see the full code now, you can check it out in github. I committed changes to roughly follow changes made in each of the following sections of this walkthrough.
I always build up my NodeJS projects piece by piece, dependency by dependency, as opposed to using pre-defined templates. I want to know exactly what dependencies are in my project, and why, and how they are configured -- and its easier to stay aware of each dependency if I install them myself.
mkdir nextjs-blog-demo
cd nextjs-blog-demo/
npm init
This might be a good time to git init.
Let's install the necessary TypeScript libraries (NextJS requires @types/node). Don't worry about setting up tsconfig just yet ...
npm install -D typescript @types/node
Install React:
npm install -D react react-dom @types/react @types/react-dom
Install NextJS:
npm install -D next
Add the following scripts to your package.json file:
"scripts": {
    "dev": "next",
    "build": "next build",
    "export": "next build && next export"
}
Now let's create our entry point at src/pages/index.tsx. The pages directory is where pages are managed by NextJS. From the docs:
In Next.js, a page is a React Component exported from a
.js,.jsx,.ts, or.tsxfile in thepagesdirectory. Each page is associated with a route based on its file name.
Any route and page we want served by our blog should be in this directory. You may notice the NextJS docs and example projects don't seem to use a src directory, but it is supported out of the box (source).
// src/pages/index.tsx
import * as React from "react";

export default class HomePage extends React.Component<{}, {}> {

    constructor(props: {}) {
        super(props);
    }

    render() {
        return <div>
            <h1>A Static Blog!</h1>
        </div>
    }
}
First, you can try running the test server to see this in action! You should see some like the following:
$ npm run dev

> [email protected] dev /home/alexander/workspace/nextjs-blog-demo
> next

ready - started server on http://localhost:3000
We detected TypeScript in your project and created a tsconfig.json file for you.

event - compiled successfully
event - build page: /
wait  - compiling...
event - compiled successfully
Notice that NextJS created the tsconfig.json for you -- how thoughtful! (Also, careful with making certain changes to it -- NextJS will automagically force it back to its own optimal configuration, although I think you can override that).
Now navigate to http://localhost:3000/ and you should see the basic blog page!
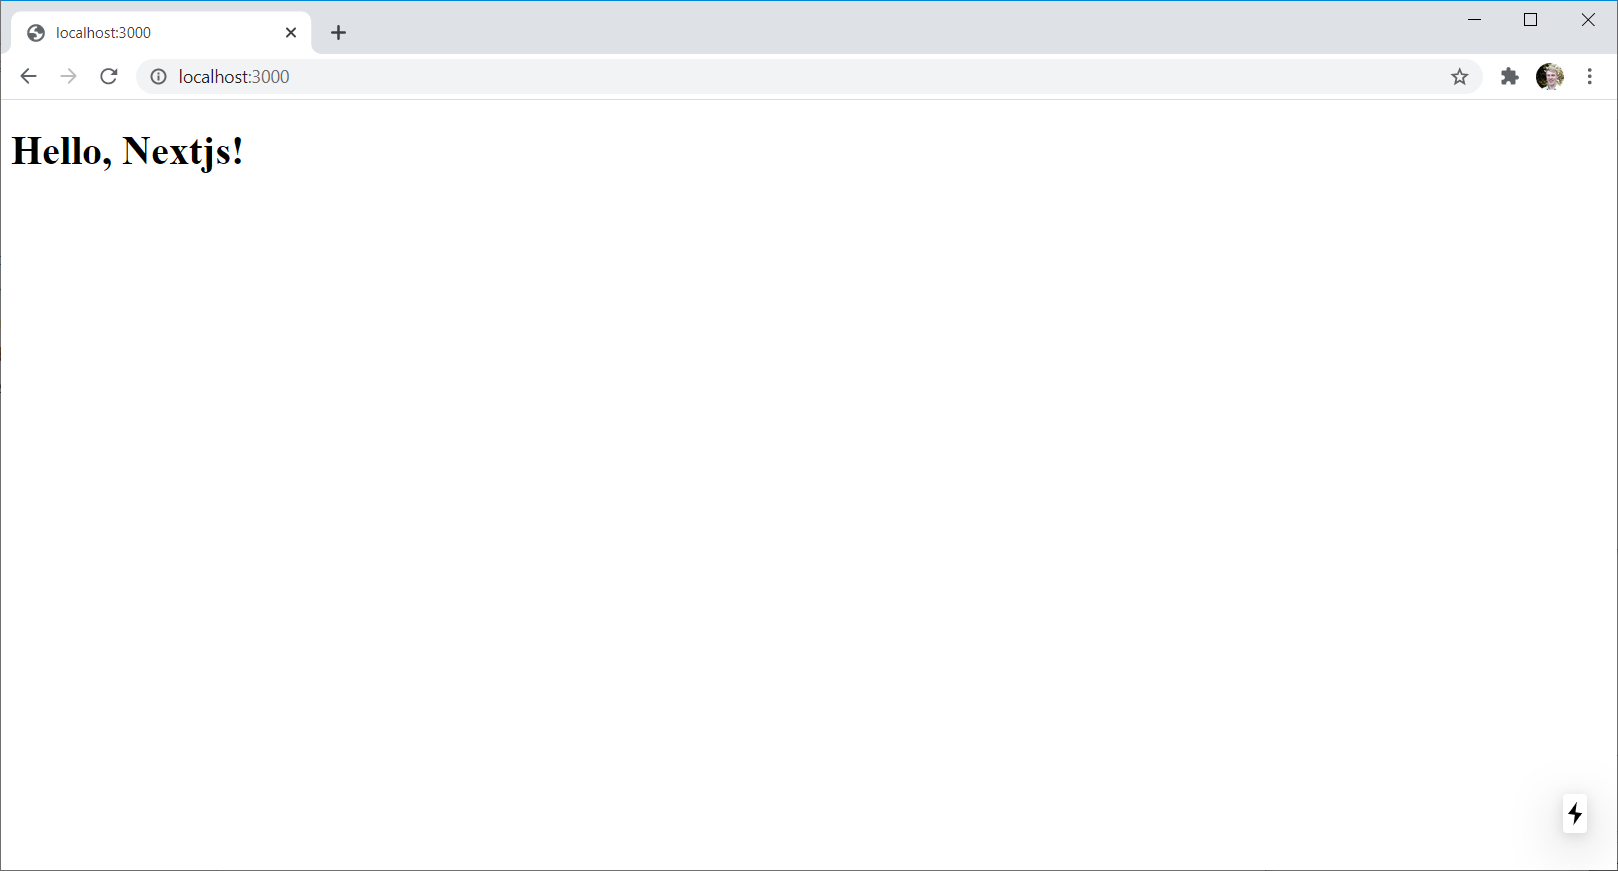
You can now try exporting this as a static website. Just run the following:
npm run export
The contents of the out directory should be the following:
$ ls out/
404.html  _next  index.html
Create Posts
Now let's build out the code to support Posts. Our desired outcome in this section is to have the following:
- A
_postsdirectory where we can add Markdown files contain our Post content - A
_posts/metadata.jsonfile where we can add metadata for each Post (path name, title, subtitle, the.mdfile to use, etc) - The home page should show a simple list of Posts by title, with links to the posts
- Each Post page should display the title, subtitle, publish date, and the content of the post in Markdown.
Load Post Metadata
Let's first start by creating a loader that reads in the Post data from the _posts/metadata.json file.
Create a file namedsrc/lib/post-data.ts and add the PostData interface:
export interface PostData {
    id: string;
    title: string;
    subtitle: string;
    dateTime: string;
    contentPath: string;
    content: string;
}
Create a file named src/lib/post-loader.ts and add the following code:
import { PostData } from "./post-data";
const fs = require('fs');

export const getPostMetadata = async (): Promise<PostData[]> => {
    const rawData = fs.readFileSync("_posts/_metadata.json", 'utf-8');
    return JSON.parse(rawData.toString())["posts"];
};
And then you can create the metadata file with the following data (or add your own!):
{
  "posts": [

    {
      "id": "a-test-post",
      "title": "A Test Post",
      "subtitle": "A subtitle for a Test Post",
      "dateTime": "2020-08-07T21:23:00.000Z",
      "contentPath": "TODO"
    },

    {
      "id": "lorem-ipsum",
      "title": "Lorem Ipsum",
      "subtitle": "Lorem ipsum dolor sit amet, consectetur adipiscing elit. Curabitur eget risus accumsan, molestie ligula vel, gravida augue. Nam interdum erat.",
      "dateTime": "2020-08-09T18:53:00.000Z",
      "contentPath": "TODO"
    }

  ]
}
Scaffolding for Post Pages
One basic feature of NextJS is dynamic routing (docs):
For example, if you create a file called
pages/posts/[id].js, then it will be accessible atposts/1,posts/2, etc.
When NextJS exports our static website, we will instruct it to read in all of the Post metadata and create a page for each Post object there. The directory structure and parameterized naming (e.g. [id].js) will determine the routing structure for your website.
Create a file at src/pages/posts/[id].tsx and add the following Post React component, which simply displays the title, subtitle, and the datetime. Nothing too complicated here. Even if all you have done is the ReactJS tutorial, the following code should bore you.
import * as React from "react";
import { PostData } from "../../lib/post-data";

interface Properties {
    post?: PostData
}

export default class Post extends React.Component<Properties, {}> {

    constructor(props: Properties) {
        super(props);
    }

    render() {
        return <div className={`${this.props.post.id}`}>
            <h1>{this.props.post.title}</h1>
            <h3>{this.props.post.subtitle}</h3>
            <p>{new Date(this.props.post.dateTime).toLocaleDateString("en-US")}</p>
        </div>
    }
}
But we not not yet loading in any data. If you tried running the dev server now, the page would render an error page with a stack trace, probably with a message like the following:
TypeError: Cannot read property 'id' of undefined
So let's make this page actually do something useful.
NextJS provides two functions you can use to fetch data to build out pages for statically generated sites (check out the docs for more info). You can fetch data from a remote API, a Wordpress site, a headless CMS, a file stored locally -- whatever. These functions will be run when you build your site i.e. when you are running the dev server or when you run npm run export.
- getStaticPaths: If you have a page with dynamic routes (as we do in this case), you use this function to create those routes dynamically based on your data set. If you had a catalog with a list of 100 products, you would fetch the list of products, and for each product, pass in or create the string you will use in the parameterized route (e.g.
/product/123.html) . In the case of our blog, we'll use the "id" field in our post metadata objects, which maps to the "id" in[id].tsx. - getStaticProps: A function that defines how to get the data for a specific page, called at build time when NextJS renders each individual page to HTML. This is defines how to fetch the specific data object(s) that are used to populate the page. In our case, we'll define the logic on how to get a specific Post metadata object for a given "id."
Let's write these functions in src/pages/posts/[id].tsx:
import { GetStaticProps } from 'next'
import { GetStaticPaths } from 'next'
import { getPostMetadata } from "../../lib/post-loader";

export default class Post extends React.Component<Properties, {}> {
    // ... see implementation above
}

export const getStaticProps: GetStaticProps = async (context) => {
    const posts: PostData[] = await getPostMetadata();
    const post: PostData | undefined = posts.find((post) => post.id === context.params.id);
    return {
        props: {
            post: post,
        }
    }
}

export const getStaticPaths: GetStaticPaths = async () => {
    const posts: PostData[] = await getPostMetadata();
    return {
        paths: posts.map((post) => {
            return {
                params: {
                    id: post.id,
                }
            }
        }),
        fallback: false,
    }
}
And now if you run the dev server, you should see the blog pages:
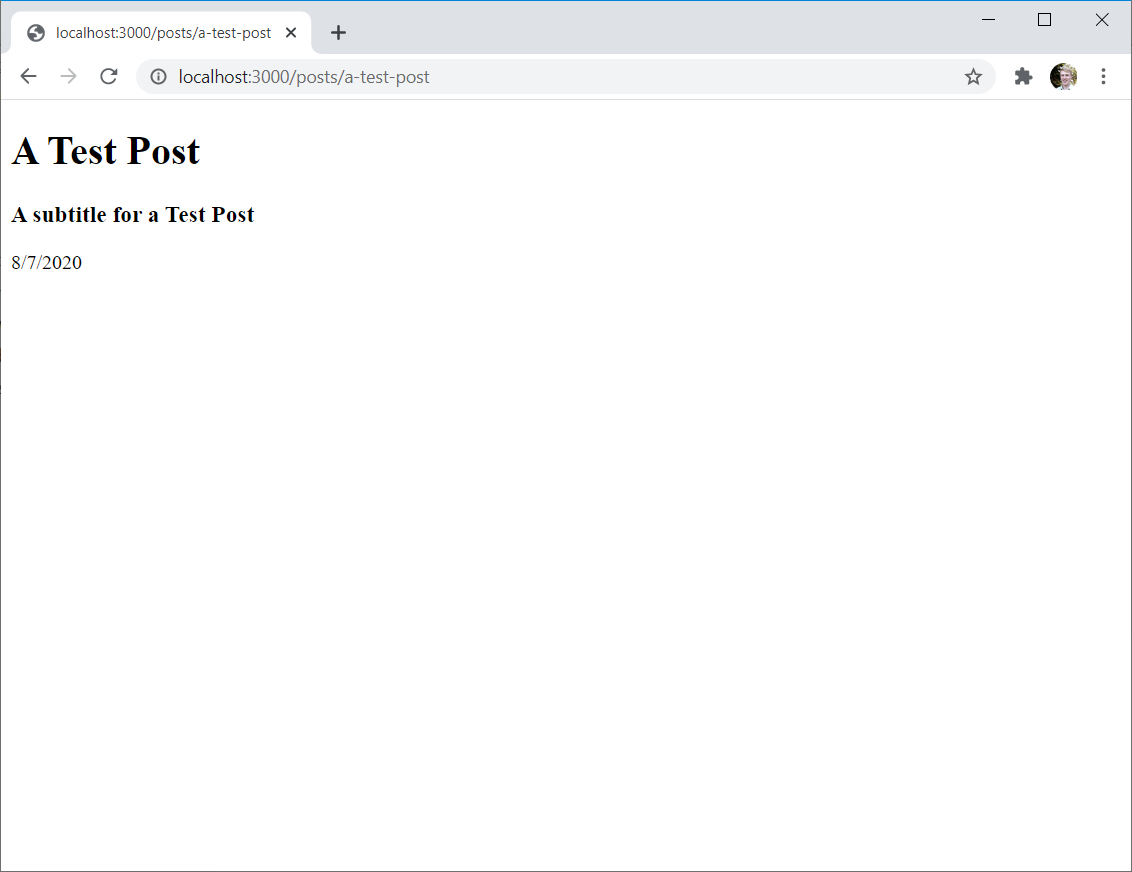
And the other post:
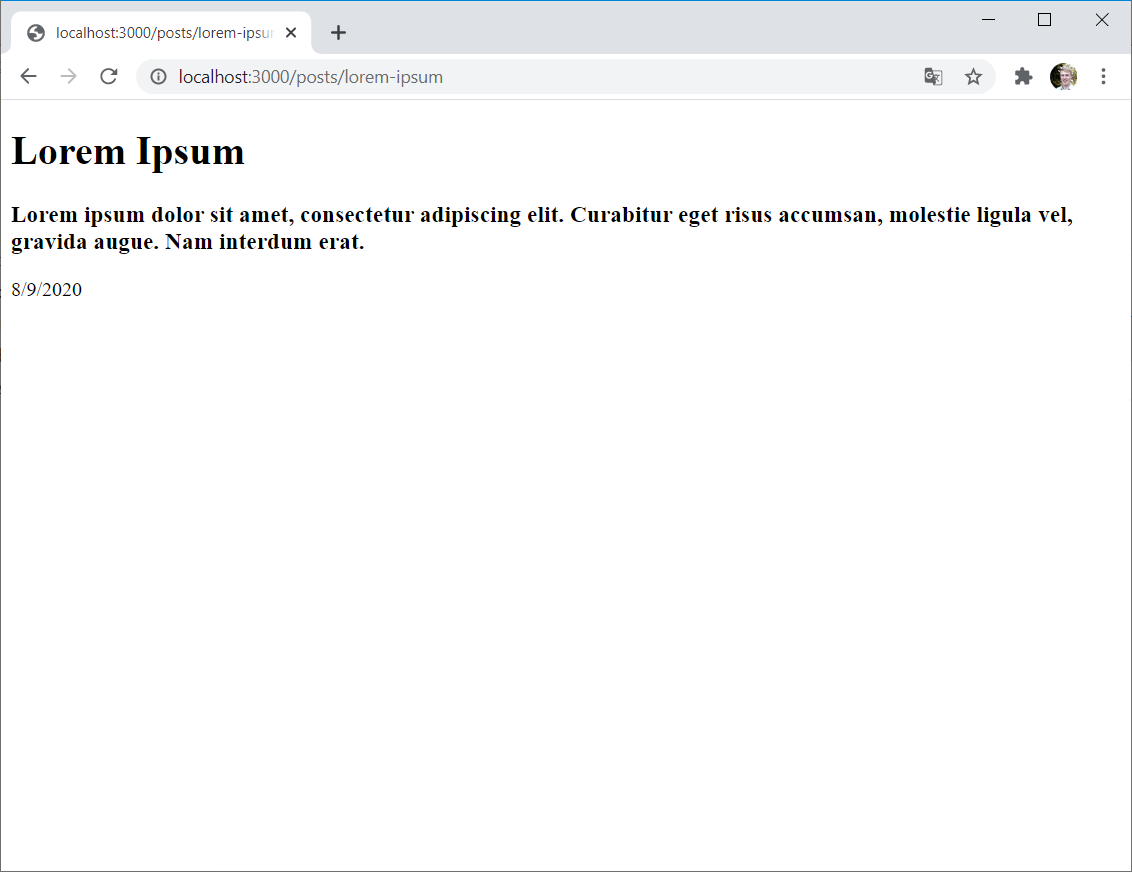
Render Markdown for Post Content
There are a few choices on JavaScript libraries for rendering Markdown to HTML, and in this case we're going to use Remark and Rehype. The reason I decided to use these libraries in my own blog is that they have a lot of plugins you can use to customize your Markdown content (which I'll demonstrate in a later section).
Install the following libraries:
npm install -D unified remark rehype remark-rehype
Create a file src/lib/markdown-to-html.ts and write in the following code:
const unified = require('unified');
const remarkParse = require('remark-parse');
const remark2rehype = require('remark-rehype');
const html = require('rehype-stringify')

export async function markdownToHtml(markdown: string): Promise<string> {
    const result = await unified()
        .use(remarkParse)
        .use(remark2rehype)
        .use(html)
        .process(markdown);
    return (result.contents as string);
}
Now, in the src/lib/post-loader.tsx, let's add the following function:
import { markdownToHtml } from "./markdown-to-html";

export const getPostMetadata = async (): Promise<PostData[]> => { ... };

export const getPost = async (id: string): Promise<PostData> => {
    const rawData = fs.readFileSync("_posts/_metadata.json", 'utf-8');
    const postDataList: PostData[] = JSON.parse(rawData.toString())["posts"];
    const post: PostData | undefined = postDataList.find((post) => post.id === id);

    if (post === undefined) {
        throw new Error(`Post with id=${id} does not exist`);
    }

    const rawMarkdown: string = fs.readFileSync("_posts/" + post.contentPath, 'utf-8');
    post.content = await markdownToHtml(rawMarkdown);

    return post;
};
Then in our Post component in/pages/posts/[id].tsx, add the content to the render() function
render() {
    return <div className={`${this.props.post.id}`}>
        <h1>{this.props.post.title}</h1>
        <h3>{this.props.post.subtitle}</h3>
        <p>{new Date(this.props.post.dateTime).toLocaleDateString("en-US")}</p>
        <div className="content markdown" dangerouslySetInnerHTML={{__html: this.props.post.content }} />
    </div>
}
And refactor the getStaticProps function to use the new getPost function we just wrote:
export const getStaticProps: GetStaticProps = async (context) => {
    const post: PostData = await getPost(context.params.id as string);
    return {
        props: {
            post: post,
        }
    }
}
Finally, in the _posts directory create markdown files containing content for our two test blog posts. Name them whatever you would like. The markdown file names do not necessarily need to match the post ids. Then, in the _posts/metadata.json file, add the markdown file names to their respective post metadata objects. Here's an example:
{
  "posts": [
    {
      "id": "a-test-post",
      "contentPath": "a_test_post.md"
    },
    {
      "id": "lorem-ipsum",
      "contentPath": "some_post_file.md"
    }
  ]
}
And now if you run your dev server, you should see the Markdown displayed in your post:
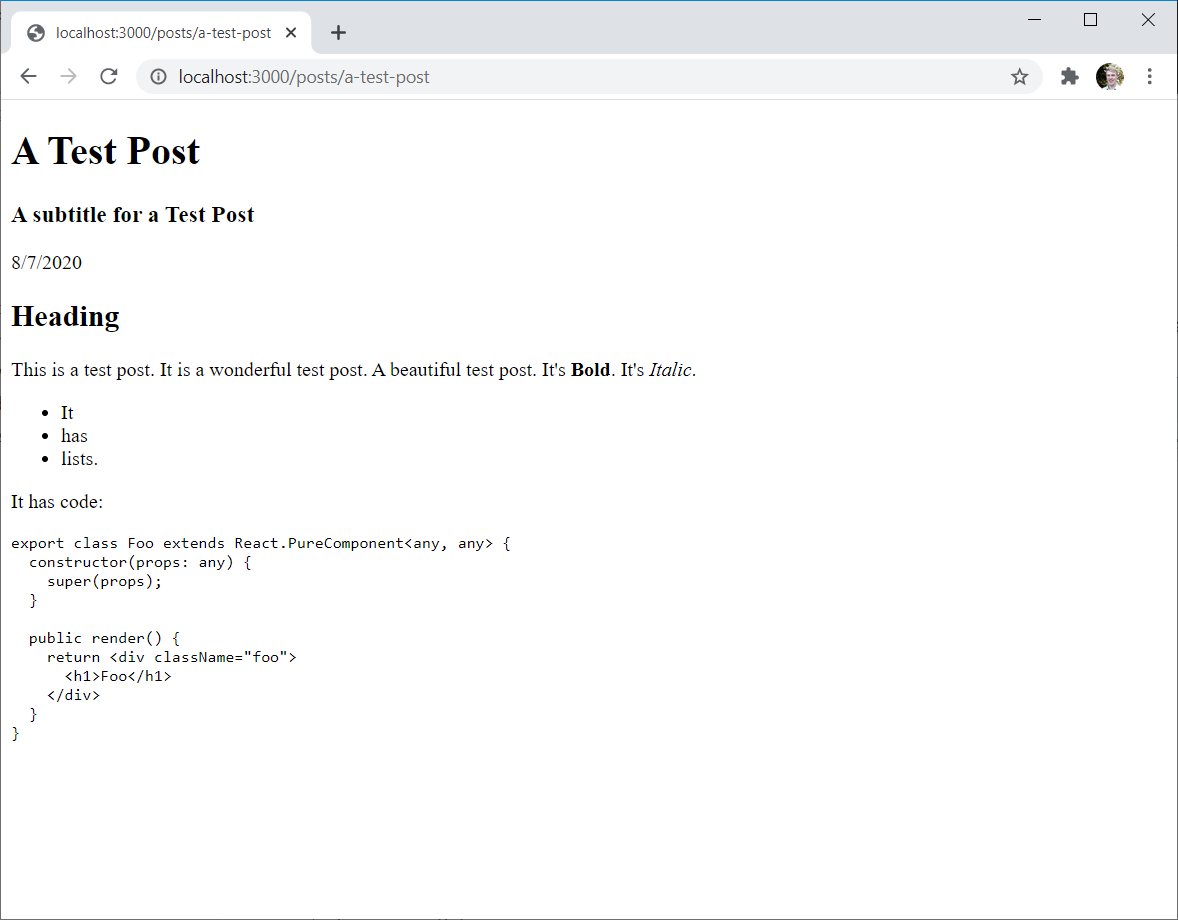
And if you run npm run export, you should see the posts in the out/posts directory, and each file should contain the rendered HTML.
$ ls out/posts/
a-test-post.html  lorem-ipsum.html
Handling Links with NextJS
Our blog isn't terribly useful without some way for users to discover posts -- so let's add links to the home page. We'll keep things simple, and just have a list of Post titles, sorted so the most recent are at the top.
But here we come to a little problem with NextJS: it provides its own client-side Routing abstraction, and provides a component for creating links (docs). This is a problem with a static website hosted in s3. NextJS will interface with the URL https://www.demo-blog.com/posts/a-test-post, but s3 won't recognize this because there isn't a file at this location -- instead, you need to use the URL https://www.demo-blog.com/posts/a-test-post.html (you have to specify the full file name, including extension). You could use the Link component and create links from the home page to your posts, and https://www.demo-blog.com/posts/a-test-post would work. But if the user refreshed the page, they would get a 404. If they tried going directly to that URL, they would get a 404.
This is a common difficultly with client-side routing and hosting via s3. If you want to make your blog a full "single-page application," you could do some work in s3 to redirect to the home page on 404s along with the path posts/a-test-post, and then bake in some logic to route back to the page using the client side routing.
But I don't care about making my blog a SPA, since I didn't want to deal with routing, or packing all of my content into a single JavaScript bundle -- I prefer having each link make a call to CloudFlare to fetch the page. So I elected a simpler solution: simply append .html to the end of the routes. This breaks the local dev server (it still wants to use /post/a-test-post), but we can set it up so it only writes .html if the NODE_ENV environment variable is set to "development".
Create a new file src/lib/transform-link.ts:
export const transformLink = (link: string) => {
    if (process.env.NODE_ENV === 'development') {
        return link;
    } else {
        return link + ".html";
    }
}
Now let's put in the links into our HomePage component in /src/pages/index.tsx. We'll make the following changes:
- Add a Properties interface with a list of PostData objects.
- Add a "createPostLinks" private function to create the list of links (this could be moved to its own React Component, if you so desire)
- Render the result from
createPostLinks - Add a
getStaticPropsstatic async function to callgetPostMetadataso its gets passed into the HomePage component properties.
import * as React from "react";
import { PostData } from "../lib/post-data";
import { getPostMetadata } from "../lib/post-loader";
import { transformLink } from "../lib/transform-link";

interface Properties {  // (1)
    posts: PostData[];
}

export default class HomePage extends React.Component<Properties, {}> {

    constructor(props: Properties) {
        super(props);
    }

    // (2)
    private createPostLinks = () => {
        const sortedPostDataList = this.props.posts.sort((postA: PostData, postB: PostData) => {
            return Date.parse(postB.dateTime) - Date.parse(postA.dateTime);
        });

        const postLinks: React.ReactElement[] = [];
        sortedPostDataList.forEach((post: PostData) => {
            postLinks.push(<div key={post.id} className={`${post.id}`}>
                <a href={transformLink(`/posts/${post.id}`)}>
                    <h4>
                        {post.title}
                    </h4>
                </a>
            </div>)
        });
        return postLinks;
    }

    render() {
        return <div>
            <h1>Hello, Nextjs!</h1>
            { /* (3)  */ }
            { this.createPostLinks() }
        </div>
    }
}

// (4)
export async function getStaticProps(context: any) {
    const posts: PostData[] = await getPostMetadata();
    return {
        props: {
            posts: posts,
        }
    }
}
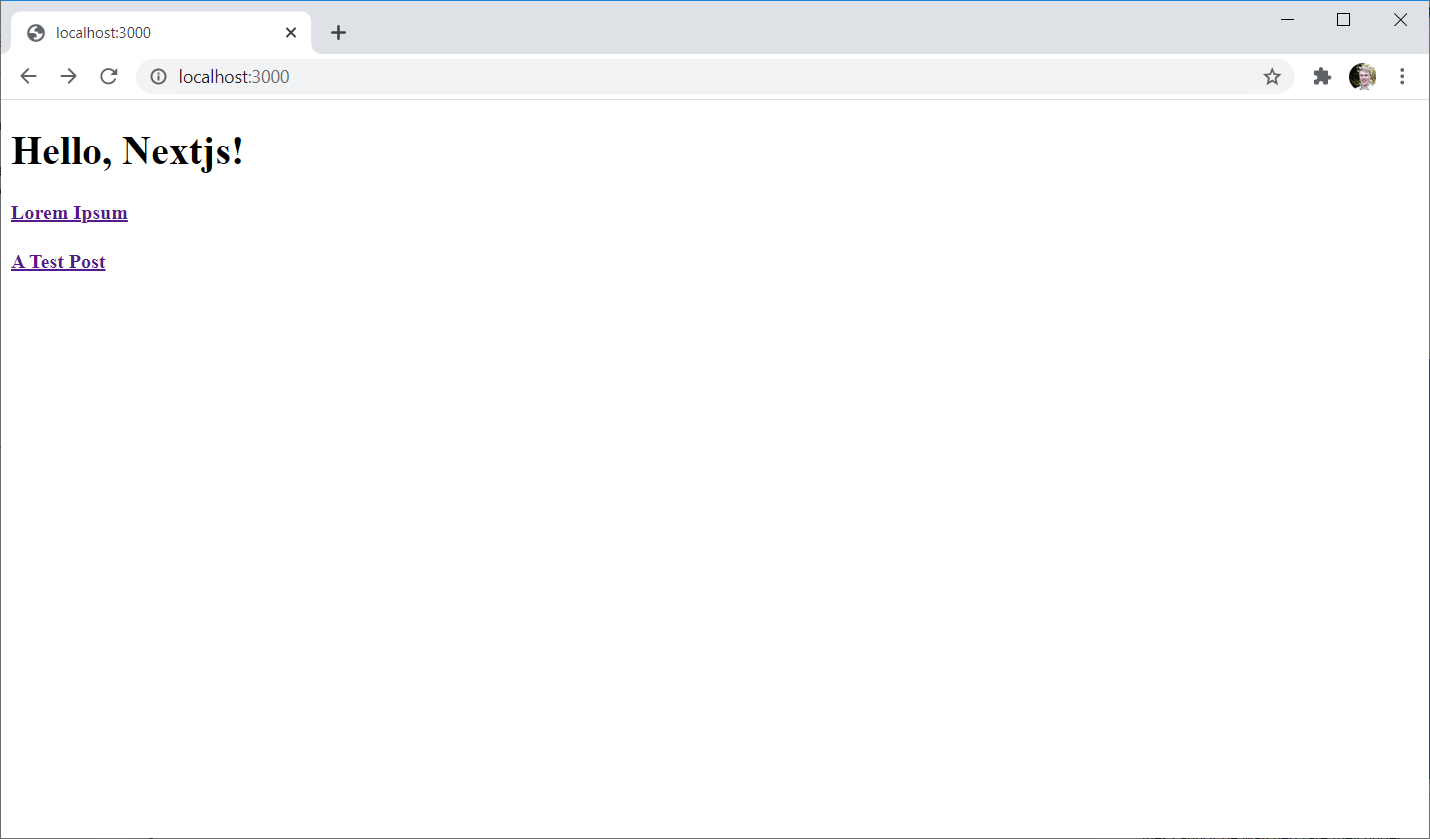
Fire up the server, and you should see the links there:
Set up Styles with TailwindCSS
TailwindCSS is my preferred framework for adding styles, it's what I used for my blog, so it's what I'm going to demo. But to each their own: if you have your own preferred style framework, go ahead and use it.
Install it:
npm install -D tailwindcss
Add a configuration file at tailwind.config.js
module.exports = {
    theme: {},
    variants: {},
    plugins: [],
    purge: [
        "./**/*.tsx",
        "./**/*.css"
    ]
}
Then add a postcss.config.ts file (PostCSS comes along with NextJS):
module.exports = {
    plugins: ['tailwindcss'],
}
If you tried running the dev server now, nothing should have changed. If you are familiar with Tailwind, then this shouldn't come as a shock. It's not like Bootstrap, which comes out of the box with styles set for you. Tailwind is a kit of tools; it's up to you to assemble it into something beautiful (or at least, halfway decent, which is what I'm shooting for).
This also means you are responsible for styling your own Markdown, but fear not! I have a set of styles here to start with.
Create a new file src/pages/app.css, and add the following:
@tailwind base;

.markdown {
    @apply text-gray-700 leading-relaxed text-base break-words;
}

.markdown > * + * {
    @apply mt-0 mb-4;
}

.markdown h2 {
    @apply text-3xl text-black font-semibold mb-4 mt-8;
}

.markdown h3 {
    @apply text-xl text-gray-700 font-bold tracking-wide mb-2;
}

.markdown h4 {
    @apply text-base text-gray-500 font-medium uppercase;
}

.markdown blockquote {
    @apply border-l-4 border-gray-300 pl-4;
}

.markdown ul {
    @apply pl-5 list-disc;
}

.markdown ol {
    @apply pl-5 list-decimal;
}

.markdown li {
    @apply mb-1;
}

.markdown a {
    @apply text-purple bg-white
}

.markdown a:hover {
    @apply bg-purple-100
}

@tailwind components;

@tailwind utilities;
Next, create a file called _app.tsx, and add the following code. What we are doing here is creating a NextJS "custom app" (docs). This allows us to set global CSS, which is all we care about right now, but it allows you to persist your layout across pages, persist data across pages, and do some custom error handling.
import type { AppProps } from 'next/app';

// import global styles
import './app.css';

function MyApp({ Component, pageProps }: AppProps) {
    return <Component {...pageProps} />
}

export default MyApp
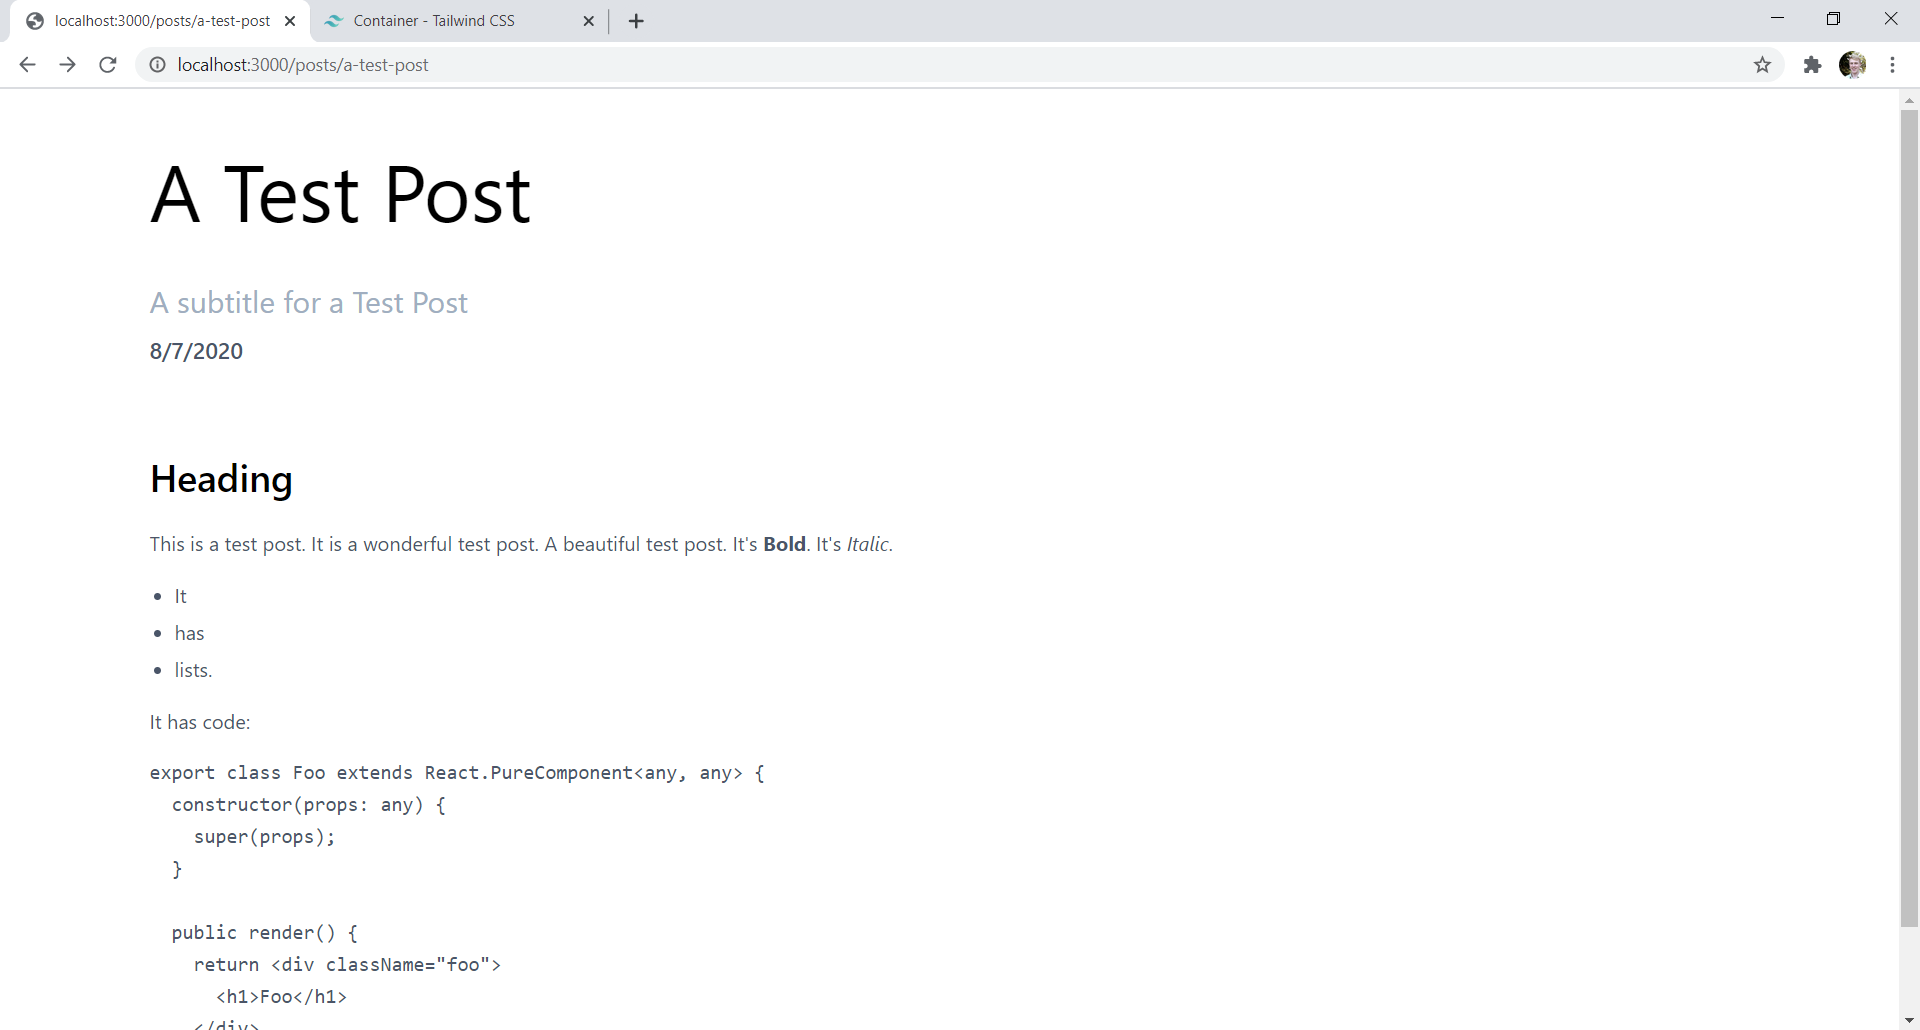
If you run the dev server now, and go to one of the test blog posts, you should see the markdown now has some style, while the title, subtitle, and date all have less style than before. You can go ahead and add any style using Tailwind that you'd like. Here's some basic style I slapped on:
render() {
    return <div className={`${this.props.post.id} container mx-auto`}>
        <h1 className="text-6xl">
            {this.props.post.title}
        </h1>
        <h3 className="text-2xl text-gray-500 mt-6">
            {this.props.post.subtitle}
        </h3>
        <p className="text-lg text-gray-700 font-semibold mt-2 mb-16">
            {new Date(this.props.post.dateTime).toLocaleDateString("en-US")}
        </p>
        <div className="content markdown" dangerouslySetInnerHTML={{__html: this.props.post.content }} />
    </div>
}
And now the page is starting to look better, kind of ... at least it's a start.
Add Syntax Highlighting with PrismJS
If you are following along with this guide, it seems likely that you have some experience with developing software. Which also means it's likely you'd like your blog to focus on software development. Which would imply that at some point you want to display some code in your blog. And you probably want that code to not look like poop.
As it currently stands, our demo blog's code blocks look like poop.
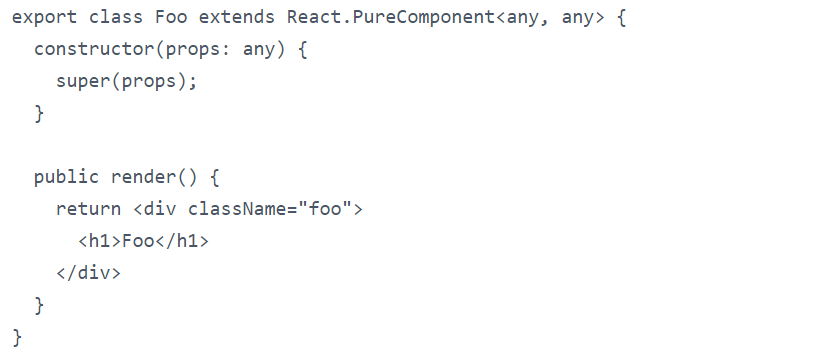
So let's add some syntax highlighting. There are a few libraries available; I prefer PrismJS. And it just so happens that there is a easy to use prism plugin for Rehype.
Install the package:
npm install -D @mapbox/rehype-prism
Open up src/lib/markdown-to-html.ts and add the plugin to our Unified pipeline:
const unified = require('unified');
const remarkParse = require('remark-parse');
const remark2rehype = require('remark-rehype');
const rehypePrism = require('@mapbox/rehype-prism'); // <- (1) Import
const html = require('rehype-stringify')

export default async function markdownToHtml(markdown: string): Promise<string> {
    const result = await unified()
        .use(remarkParse)
        .use(remark2rehype)
        .use(rehypePrism)      // <- (2) Add to the pipeline
        .use(html)
        .process(markdown);
    return (result.contents as string);
}
Next, open up src/pages/_app.tsx and import whichever Prism theme you would like to use. My favorite flavor is "prism-tomorrow."
// import prism theme
import "prismjs/themes/prism-tomorrow.css";
Re-run the dev server, and you should see beautifully styled code blocks:
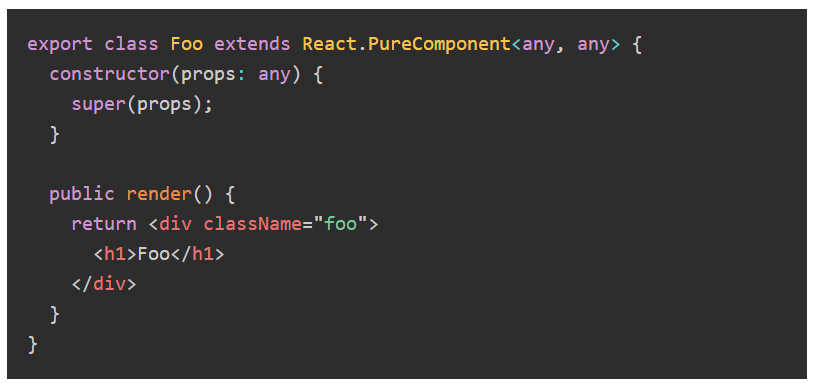
Now, the astute among you (engineers who have learned through hard-earned experience to question any dependency they take) may have already checked out the Github page, and may have seen the following warning:
Best suited for usage in Node. If you would like to perform syntax highlighting in the browser, you should look into less heavy ways to use refractor.
According to bundlephobia, the bundle size for version 0.5.0 of @mapbox/rehype-prism is 457.9kb minified, and 165kb compressed. That's 3.3 seconds in 3G speeds.
Zoinks!
-- Shaggy
But fear not! We now can experience the beauty of NextJS's static html generation -- out of the box, it comes with a number of optimizations to cut out dead code, leaving you with the minimum needed to render the page.
As proof of this, simply run npm run export. It prints out a handy report of the file sizes. We can clearly see that even with a heavy-weight dependency, our exported pages are still very small.
Page                                                           Size     First Load JS
┌ ● /                                                          1.98 kB        59.9 kB
├   /_app                                                      0 B            57.9 kB
├ ○ /404                                                       3.45 kB        61.4 kB
└ ● /posts/[id]                                                1.29 kB        59.2 kB
    ├ /posts/a-test-post
    └ /posts/lorem-ipsum
+ First Load JS shared by all                                  57.9 kB
  ├ chunks/f6078781a05fe1bcb0902d23dbbb2662c8d200b3.913f29.js  10.2 kB
  ├ chunks/framework.de5b92.js                                 40 kB
  ├ chunks/main.760499.js                                      6.73 kB
  ├ chunks/pages/_app.f3316d.js                                293 B
  ├ chunks/webpack.488dc2.js                                   751 B
  └ css/2789c124b5d32e210640.css                               17.1 kB
Conclusion
The code we have now isn't the prettiest, but it's a solid foundation on which to build up your blog. Add your own unique style. Create a layout for posts and for the home page. Add an integration with a comment service like Disqus or Commento. And of course, write, write, write!
Again, you can checkout the full repo in github.
Cheers!